Information provided is based on research. We strive for accuracy, but consult professionals for personalized advice. External links are not under our control. See our Privacy Policy for details.
Solution
Step 1: Open a New Project in Figma
- Solution: Log in to Figma, and click on New File. This will open a blank canvas where you’ll create your design.

Step 2: Set Up Your Artboards
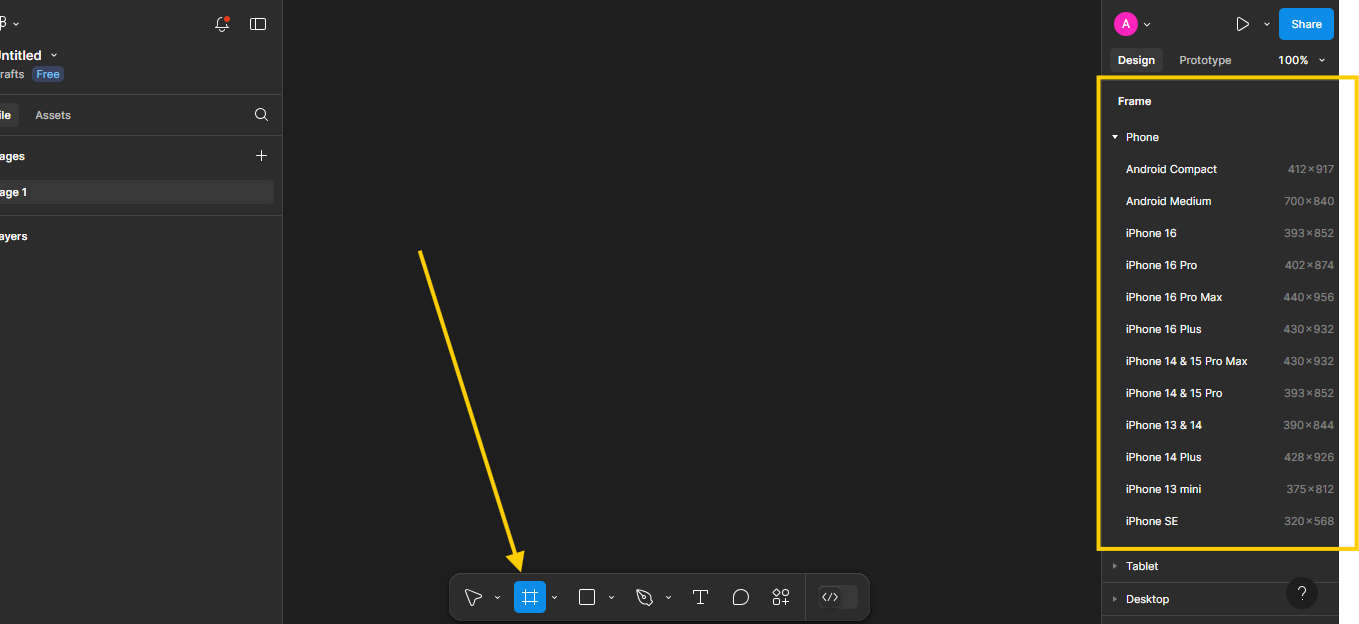
- Solution: Choose Frames from the left toolbar to create artboards. Select iPhone X, Pixel 2, or any mobile size that fits your design needs.

- Each frame represents a different screen in your app.
Step 3: Design the App Layout
- Solution: Start by sketching the general layout of each screen using Shapes like rectangles and circles from the toolbar.
- Arrange elements like headers, footers, and content blocks. Keep everything aligned by using Guides and Grid Layouts from the right-hand panel.
Step 4: Add Components and Buttons
- Solution: Add interactive elements by clicking on Text and Shape Tools to create buttons, input fields, and navigation elements.
- Customize these components by adjusting colors, shadows, and borders in the Properties panel on the right.
Step 5: Use Figma’s Icon Library
- Solution: Select Plugins > Iconify or search for icons directly in Figma’s resources.

- Drag icons onto your artboards and resize them as needed.

Step 6: Add Text and Typography
- Solution: Use the Text Tool to add titles, labels, and body text. Choose fonts that are clear and appropriate for mobile screens.
- Set font size, weight, and color in the right-hand panel for a consistent look across your app.
Step 7: Add Colors and Styles
- Solution: Define a color palette in the Assets panel under Styles to maintain consistency.
- Apply these colors to your elements by selecting the item and choosing the color from your saved palette.
Step 8: Create Interactive Prototypes
- Solution: Switch to the Prototype tab and connect frames by dragging arrows from elements like buttons to other screens.
- Set transitions and animations to demonstrate how the app flows from one screen to another.
Step 9: Preview and Test Your Design
- Solution: Click on the Present button to see how the design looks on a mobile device.
- Test each interaction to ensure buttons and navigation work as expected.
Step 10: Share and Collaborate
- Solution: Click Share in the top-right corner to invite collaborators or generate a view-only link.
- Use comments to gather feedback directly on the design.
Designing an app can seem complex, but Figma simplifies the process. It offers a structured environment where you can create, test, and refine your design quickly. This step-by-step guide will help you start designing an app in Figma, whether you’re a beginner or refining your skills.
Finally
With Figma, designing an app is straightforward. By following these steps, you’ll have a complete prototype ready for testing and feedback.
Related: How to Turn Figma Into a Website


